Yep, that’s a pile of bent up aluminum capping on my bedroom rug. It’s gonna be an exciting year at the Crooked House! If you haven’t found my new site yet, come on over. http://chadscrookedhouse.com/
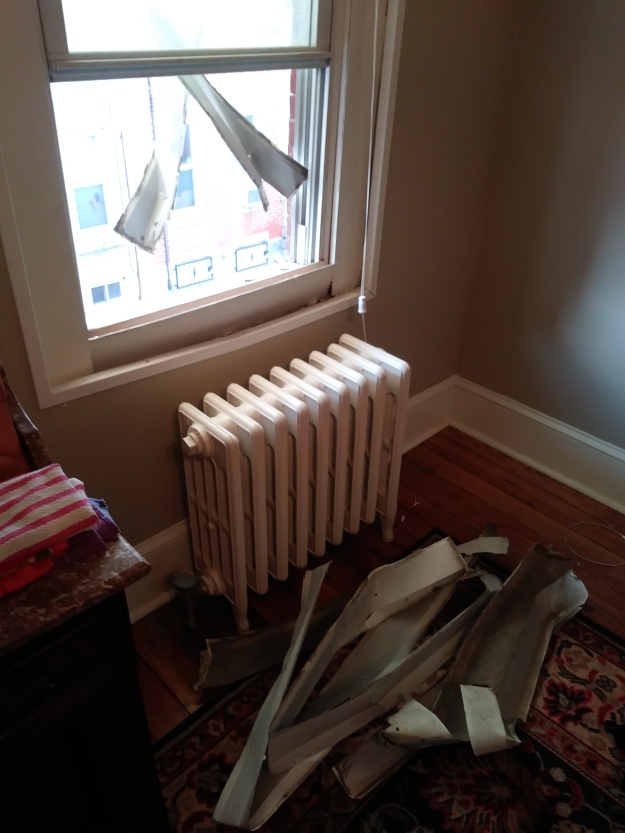
Yep, that’s a pile of bent up aluminum capping on my bedroom rug. It’s gonna be an exciting year at the Crooked House! If you haven’t found my new site yet, come on over. http://chadscrookedhouse.com/
After 5 years on the free version of WordPress, I’ve decided to see what the fuss is about with a self hosted blog. Check out my new site – chadscrookedhouse.com. It should be an exciting year. I’ll be rolling out an action plan for the big scary facade restoration next week!

I’ve had a few reasons. The biggest being curiosity. I want to see what happens if I make the site look nicer.
Then I’ve been a little frustrated because I set up pages for a house tour a year ago and for some reason the links never worked. I’ve ignored that for a solid year, but it seems important to set up a site where old content is better organized. There were no pretty pictures in my first 3 years, but what I was doing back then was more interesting than cleaning out closets.
And, I redid my house while single and in my twenties (until a year ago). I’ve noticed that a lot of bloggers get paid or comped with free stuff. Getting paid is a violation of the terms of use of the free version of WordPress, and they could delete the whole blog if I got caught cheating. The self hosted version allows me to explore opportunities for shameless commercialism… or hopefully simply the opportunity to get comped now and then for stuff I already believe in.
Anyways, please check out the new page, follow me there, and let me know if you have any advice!
This year has kind of felt like a slog. But when we look back to where the house was a year ago, I think we have cause for optimism.

Can you spot the changes?

I’m excited about having the table set. That means Year 6 is starting out right. But back to last year… I started off Year 5 staining the handrail and prepping and priming the rest of the stairway and paneling. It was a tedious job and I was ready for a break.

Instead, I let the Irishman build cabinet doors for my kitchen. (Did you notice how messy it looked without them?) This was bar none the most mismanaged project anyone ever took on at my house. The cost overruns had me in the hole from June to December and for months and all I could do was train myself not to care about the mess that took over my first floor and the public sidewalk in front of my house. This was definitely not legal so I’m just glad no one turned me in.

When the Irishman was done, I’m not sure if there was a single door that was actually in acceptable condition. Some had surface flaws that became evident after they were painted over, some were the wrong size and didn’t close right, and some got scratched before they were installed. For the time being I ignored it all because I couldn’t stand the sight of them.

Once again, no break. I went head on into another project that was far more annoying than I expected: stucco.

Or really, the annoying part was the building paper, lathe, flashing, and casings. On the bright side, this makes the house look a lot more finished and less scary.

At this point, I sincerely wanted to leave the house a pigsty forever and never touch another project again. But I also wanted to get those cabinet doors off the floor (and make them look closer to what my money should have bought). I participated in a 30 projects in 30 days challenge in September. A lot of the things I actually wanted to close out were too big to average a project a day, so I went with it and found smaller projects to do. The odd pieces of not-yet-installed moldings and the piles of unused building materials.
And in October, my dad and I worked a miracle on those cabinet doors. It took about 2 weeks of hard work, a little too much to average a project a day.

Then after a good long Christmas break, I tackled the Leaning Tower of Pyrex. I’ve added enough extra shelves inside my kitchen cabinets that some of them are only about 5 inches apart. It’s great and I don’t understand why more people don’t do this.

And the work I stared on the linen closet? It should be done by now but instead it’s… on hold.
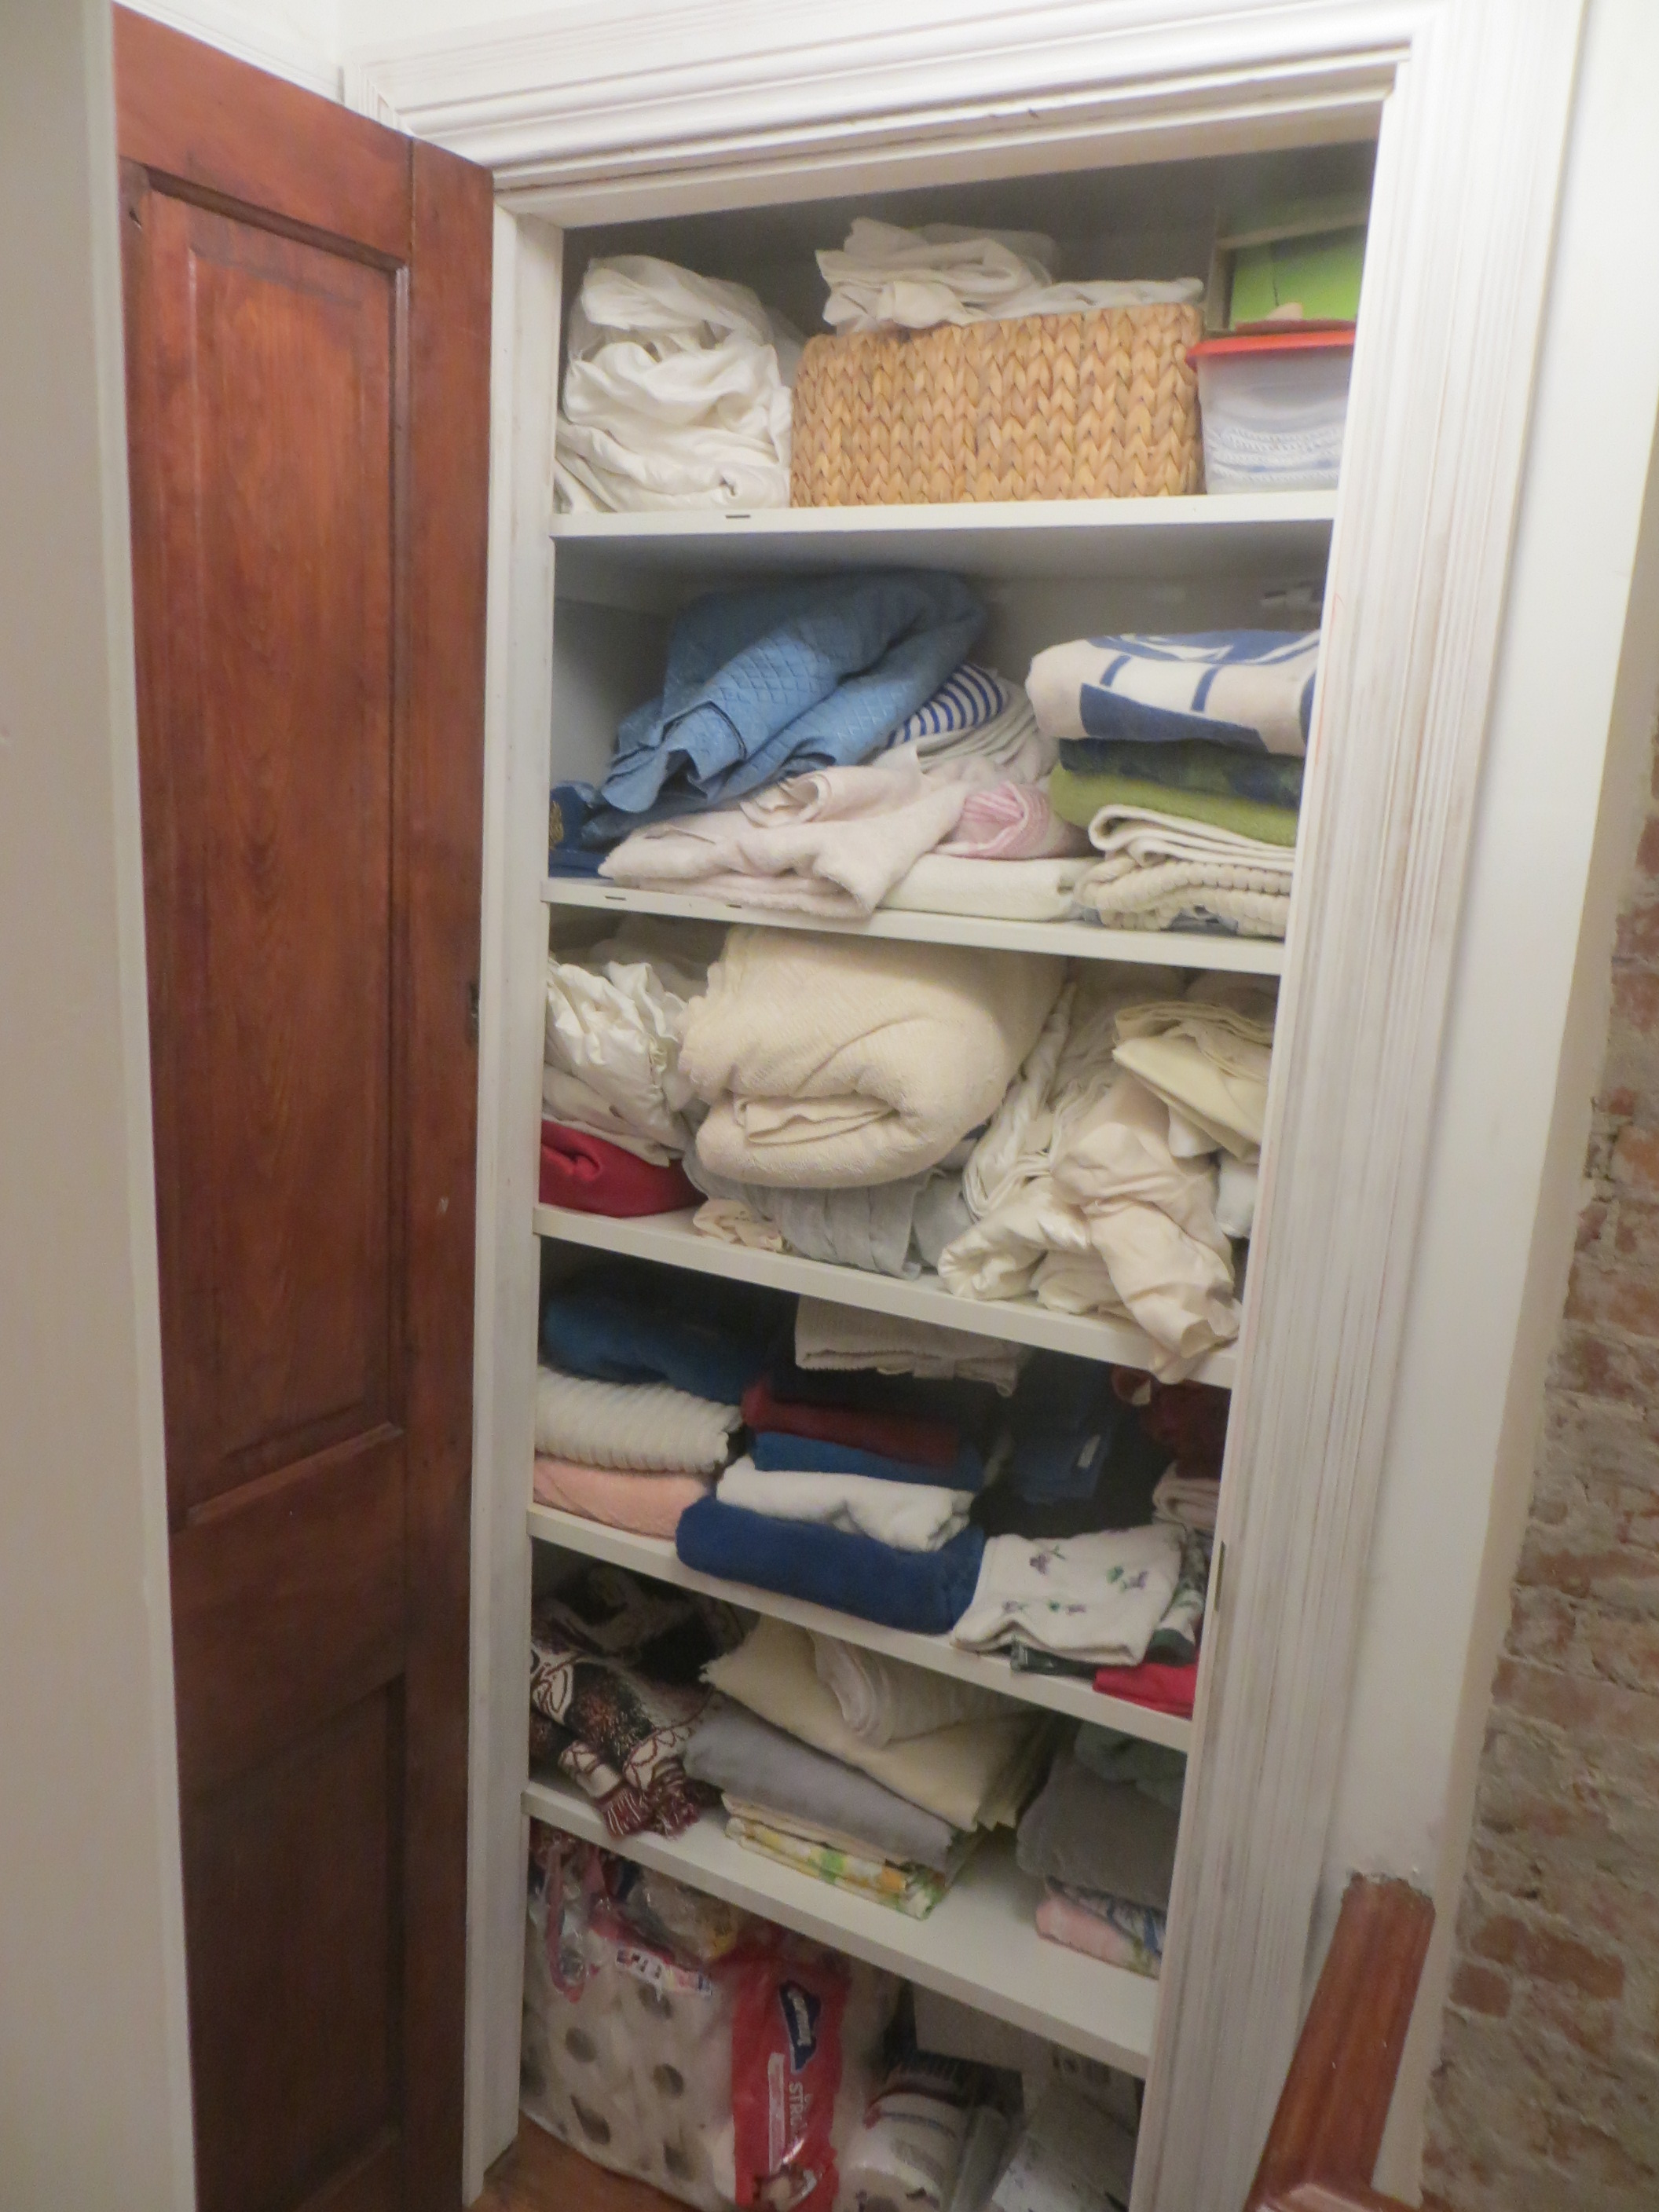
I thought it would be done by now, and that right about now I’d be taking a good look at each of my linens/life choices as I moved them back into the closet where they belong. What got in the way? A friend who needed to get out of a bad living situation, fast. It was messy but it works out. I was planning on looking for a short-term roommate again anyway.
Did you miss me? I took a solid 2 months off working on the house and that’s been really great. In fact, I haven’t been this social in 6 years, before I bought the place. Relatedly, I decided to reorganize the kitchen cabinets. Partially because some of them are a disorganized mess and partly to get the Martini glasses on a shelf where I don’t have to jump onto the countertop to reach them.
And to do that, I’m adding 8 more shelves. I took advantage of some oddly warm January weather to go to my parents’ place and cut up scrap wood left over from the kitchen cabient doors, and now I’m painting the ones that weren’t painted on both sides. The ones that are painted blue are going to stay that way. I don’t care.
While I was at it with painting kitchen shelves, I sooner or later need to paint the linen closet. After the previous roommate moved out last fall I emptied the linens into the back bedroom closet and then never came back to that. But while I was rolling primer onto them I noticed how bad the walls were. There was no casing around the door on the inside and there were gaping holes in some of the walls. A big piece of plaster fell off at the bottom. The shelves are too big to install continuous runs of casing. Nothing is square, the walls aren’t close to flat, there’s nothing to nail into, and the plaster is globbed out way beyond the door jamb. This quick little job got annoying fast.

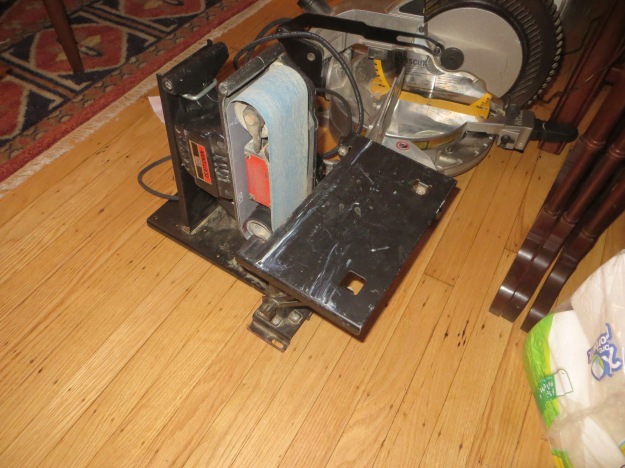
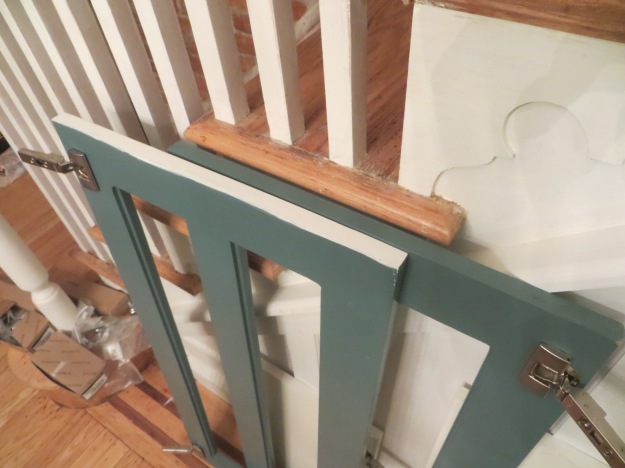
So, I pulled scraps of the downstairs casings, sorted by size, and a skinny little offcut from the kitchen fronts out of the lumber hoard and cut them to fit into the spaces between the shelves. (The Irishman gave me this saw. You can tell because the pieces to prevent you from cutting your fingers off are missing.)

And I had an awful time trying to fit into this closet to nail the pieces in. I bent nails over and over again and then couldn’t manage to hit any studs. I can’t tell what’s holding the original parts of this house together and I don’t ask.
I screwed in the moldings on one side, and that worked MUCH better. Remember how I rebuilt the side of the arch between the living room and the kitchen 3/4″ smaller to make the casing thicker on the one side? I saved the old piece and it was a little battered but just the right size! And this might be the last time anyone sees it.

On the other side where there’so only room for something really skinny, there was also no way I could figure out to nail anything in. So I just cut things a little long and wedged them in place. I still need to cut off this 1 protruding shim.

Both sides have big ugly gaps. Like I said, the walls aren’t flat or square and the plaster is glooped beyond the door jamb. And then how do you like the way the shelves don’t even match? The ones with the nosings were extras out of a friend’s parents’ basement. When they ran out I made the rest and didn’t bother to add nosings to them. And this reminds me that I need to fill the hole from the old door strike. I switched which way this door opens when I repurposed the closet for linens.

And when I was cutting the shelves to fit into these not-square walls, I just kept the saw blade square and notched and notched and notched. I could be worried about things falling into these gaps and disappearing forever.

Anyways, I got a reliable endorsement for Big Stretch caulk from Ross. It apparently fills wide gaps on the exterior of his house that he’s meticulously restoring. Hopefully it does equally well to hide the sins in this slapped-together linen closet.
The old plan was to do the best I could to spruce up my circa 1990 Victorianesque front door this winter. I gleefully abandoned that plan when I found a door that’s close to period correct that’s almost narrow enough. Almost. I’m a small bit nervous about trimming allowances.

Obviously the door needs to be stripped. I’m thinking I’ll pick out details on the outside of the door by painting it 2 colors. Nothing too high contrast though; that can get garish. Or if it winds up too nice to paint maybe I’ll stain it instead. I love the fancy little ledges below the glass that are so common on old doors, so I might add one to mine. I’m also hoping to get nice beveled glass, but if I have to choose between beveled and laminated (the best for burglar resistance) I’ll have no choice but to go with the latter.
Now that the door is going to be authentic, I’m going with clear glass, which makes me feel much better than hemming and hawing over textures that I wasn’t that thrilled about. For privacy I’ll get a sheer curtain panel hung on 2 rods. Basic, plain, traditional, and lets most of the light through.
(Speaking of light, have I said lately how excited I am to take down the awnings?)
Then there’s the hardware, my favorite thing. I’ve said before how excited I was to get the one and only old door that came with my house back up, along with its glass knob and Art Deco back plate. I also scored another matching back plate at Philadelphia Salvage. They’re a South Philly thing apparently.

Across the room, I put in a vestibule door that a neighbor gave me, salvaged from his house. It came with hardware in a different style but I’m guessing it would be from the 1930’s like mine.
At first I thought I’d make all the hardware match downstairs, install the Deco back plates on the vestibule door, and put something else on the back side of the basement stairway door. Then I thought maybe it was better to honor the history of the vestibule door and put its original hardware back on and hold the third Art Deco back plate. But now that I have an old front door with a mortise lock I prefer a third option. First off, I’m kicking myself a little bit for splurging on Baldwin hardware that I won’t be keeping.
But anyway, I’m putting a fauxriginal knob on the outside of the front door just like I have upstairs. The door came with cast iron roses attached and I have white porcelain knobs to spare. My parents have a pristine deadbolt that I’ll install. It’s conspicuously shiny, but it’s Schlage and I’d rather not carry an antique skeleton key in my pocket. Even though that would be cool.
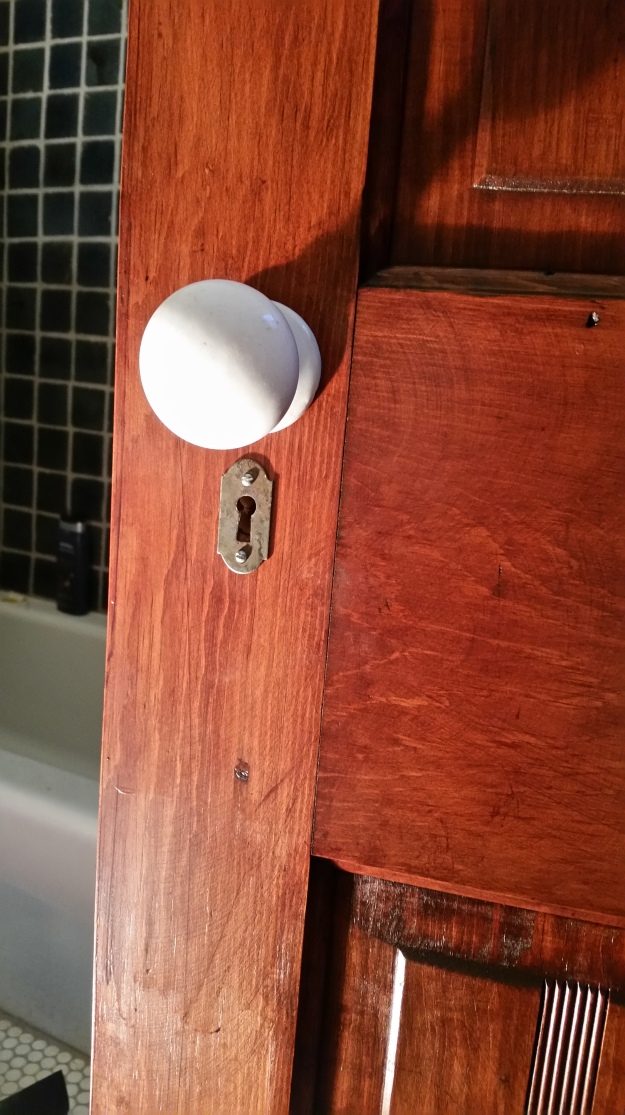
Inside, I’m planning to install one of my 1930’s back plates on the inside of the folk Victorian front door. That will give some vague cohesiveness to the first floor, and it’s something people actually did to their Victorian doors at the time. My new plan is to use the vestibule door pattern in the vestibule and the Deco pattern in the living room. I think that gives me the best combination of cohesiveness and letting my neighbor see his hardware when he walks into the house.
The front door is now on hold until the other exterior work is in progress. Phew. But if I have the ambition and it stays warm enough to leave the vestibule door open, I just might restore it in January. The better everything else looks, the more I notice bits of nasty like this.
Well, the beer tour was fun! Ticket sales were down a bit this year, which meant that the crowd fit into my house better than last year. I forgot to take photos but picture about 3/4 of this. Also look at the unfinished banister and the pig tail!

Now, some people said that no one would notice any changes from last year. Based on this comment, you were half right: “It looks so much more finished than last year! Did you get new counter-tops?” Ironically, my sister told me the very next day that her boyfriend was looking at the kitchen’s current state and he said that now I need to replace the counter-tops because they look cheap next to the doors. This is fitting because I paid $50 for them. See where the edging is missing to the right? Gluing that back on should make them look a little less cheap.
I’m grateful for LOTS of help getting the place clean since less than a week before I was still painting. My mom’s help came of course with free advice: from here on out, I should keep the house clean all the time and also finish all the painting. I’m still leaning closer to none, or maybe some odds and ends and touch-ups, until January.
But anyways, here’s what the place looked like the day after the tour.

Aside from the clean house I had half a catering tray of mac and cheese left behind. My mom said I should give it to the Irishman’s family, but she doesn’t know what it’s like to be a bachelor. I ate it for breakfast every day last week. Only one coworker said anything about this.

So, Chad’s retiring from house projects until January? Not quite. I really need to clean out the basement. It became a dumping ground and a half this time.

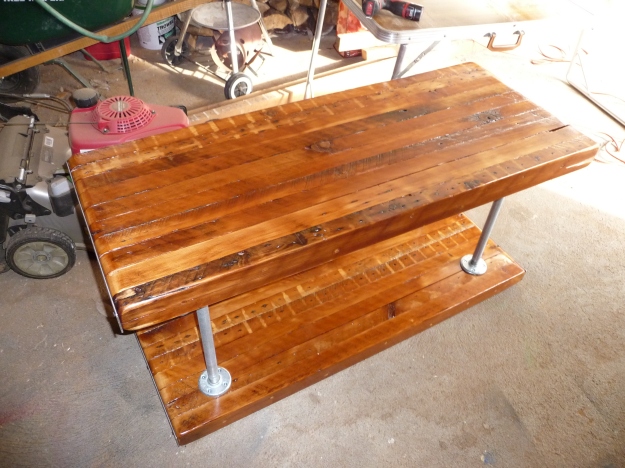
On top of the light reorganizing that my basement ends up desperately needing about once a year, there are some things in this lumber-hoard that I may be ready to work with soon, so it’s time to go through it. Does anyone want 125 year old rough sawn lumber? I have an awful lot of it. My next door neighbor growing up made made this table out of my lumber.
Aside from that, I could stand to make 2 Homasote bulletin boards, (I already own the Homasote) install the mahogany boards currently in the lumber-hoard at the top of my bookcase (even though I’ll take them down again later once I figure out staining them),

Re-glue the counters of course, and replace the missing insulation and beadboard up here:

The last piece up there has saw cuts in it and has to go. I’m thinking the way to fix this mess is to cut the nails holding that piece up with a Sawzall, then pull it out as cleanly as I can. I’ll check how many of the removed boards are salvageable, and then buy replacements. My dad suggested boarding over all of it. Replacement boards are $8 each, so I’d rather patch it so this job keeps a 2-digit price tag. I have some cellulose insulation in the basement, so I think I’d want to put up some kind of mesh and then stuff it in. It’s only missing from about 2 cubic feet. I can, sigh, even paint the boards before they go up, though they’ll need touch-up painting again next year when it’s warm enough.
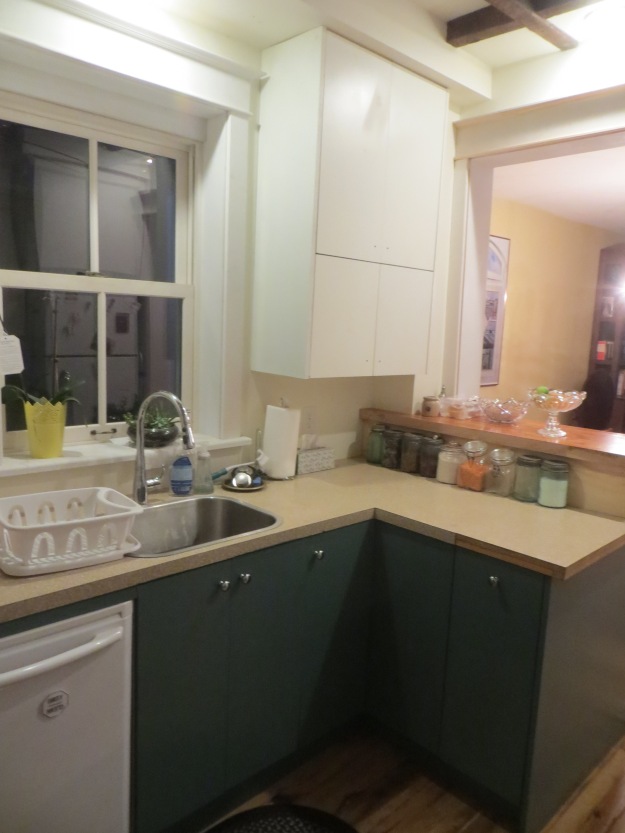
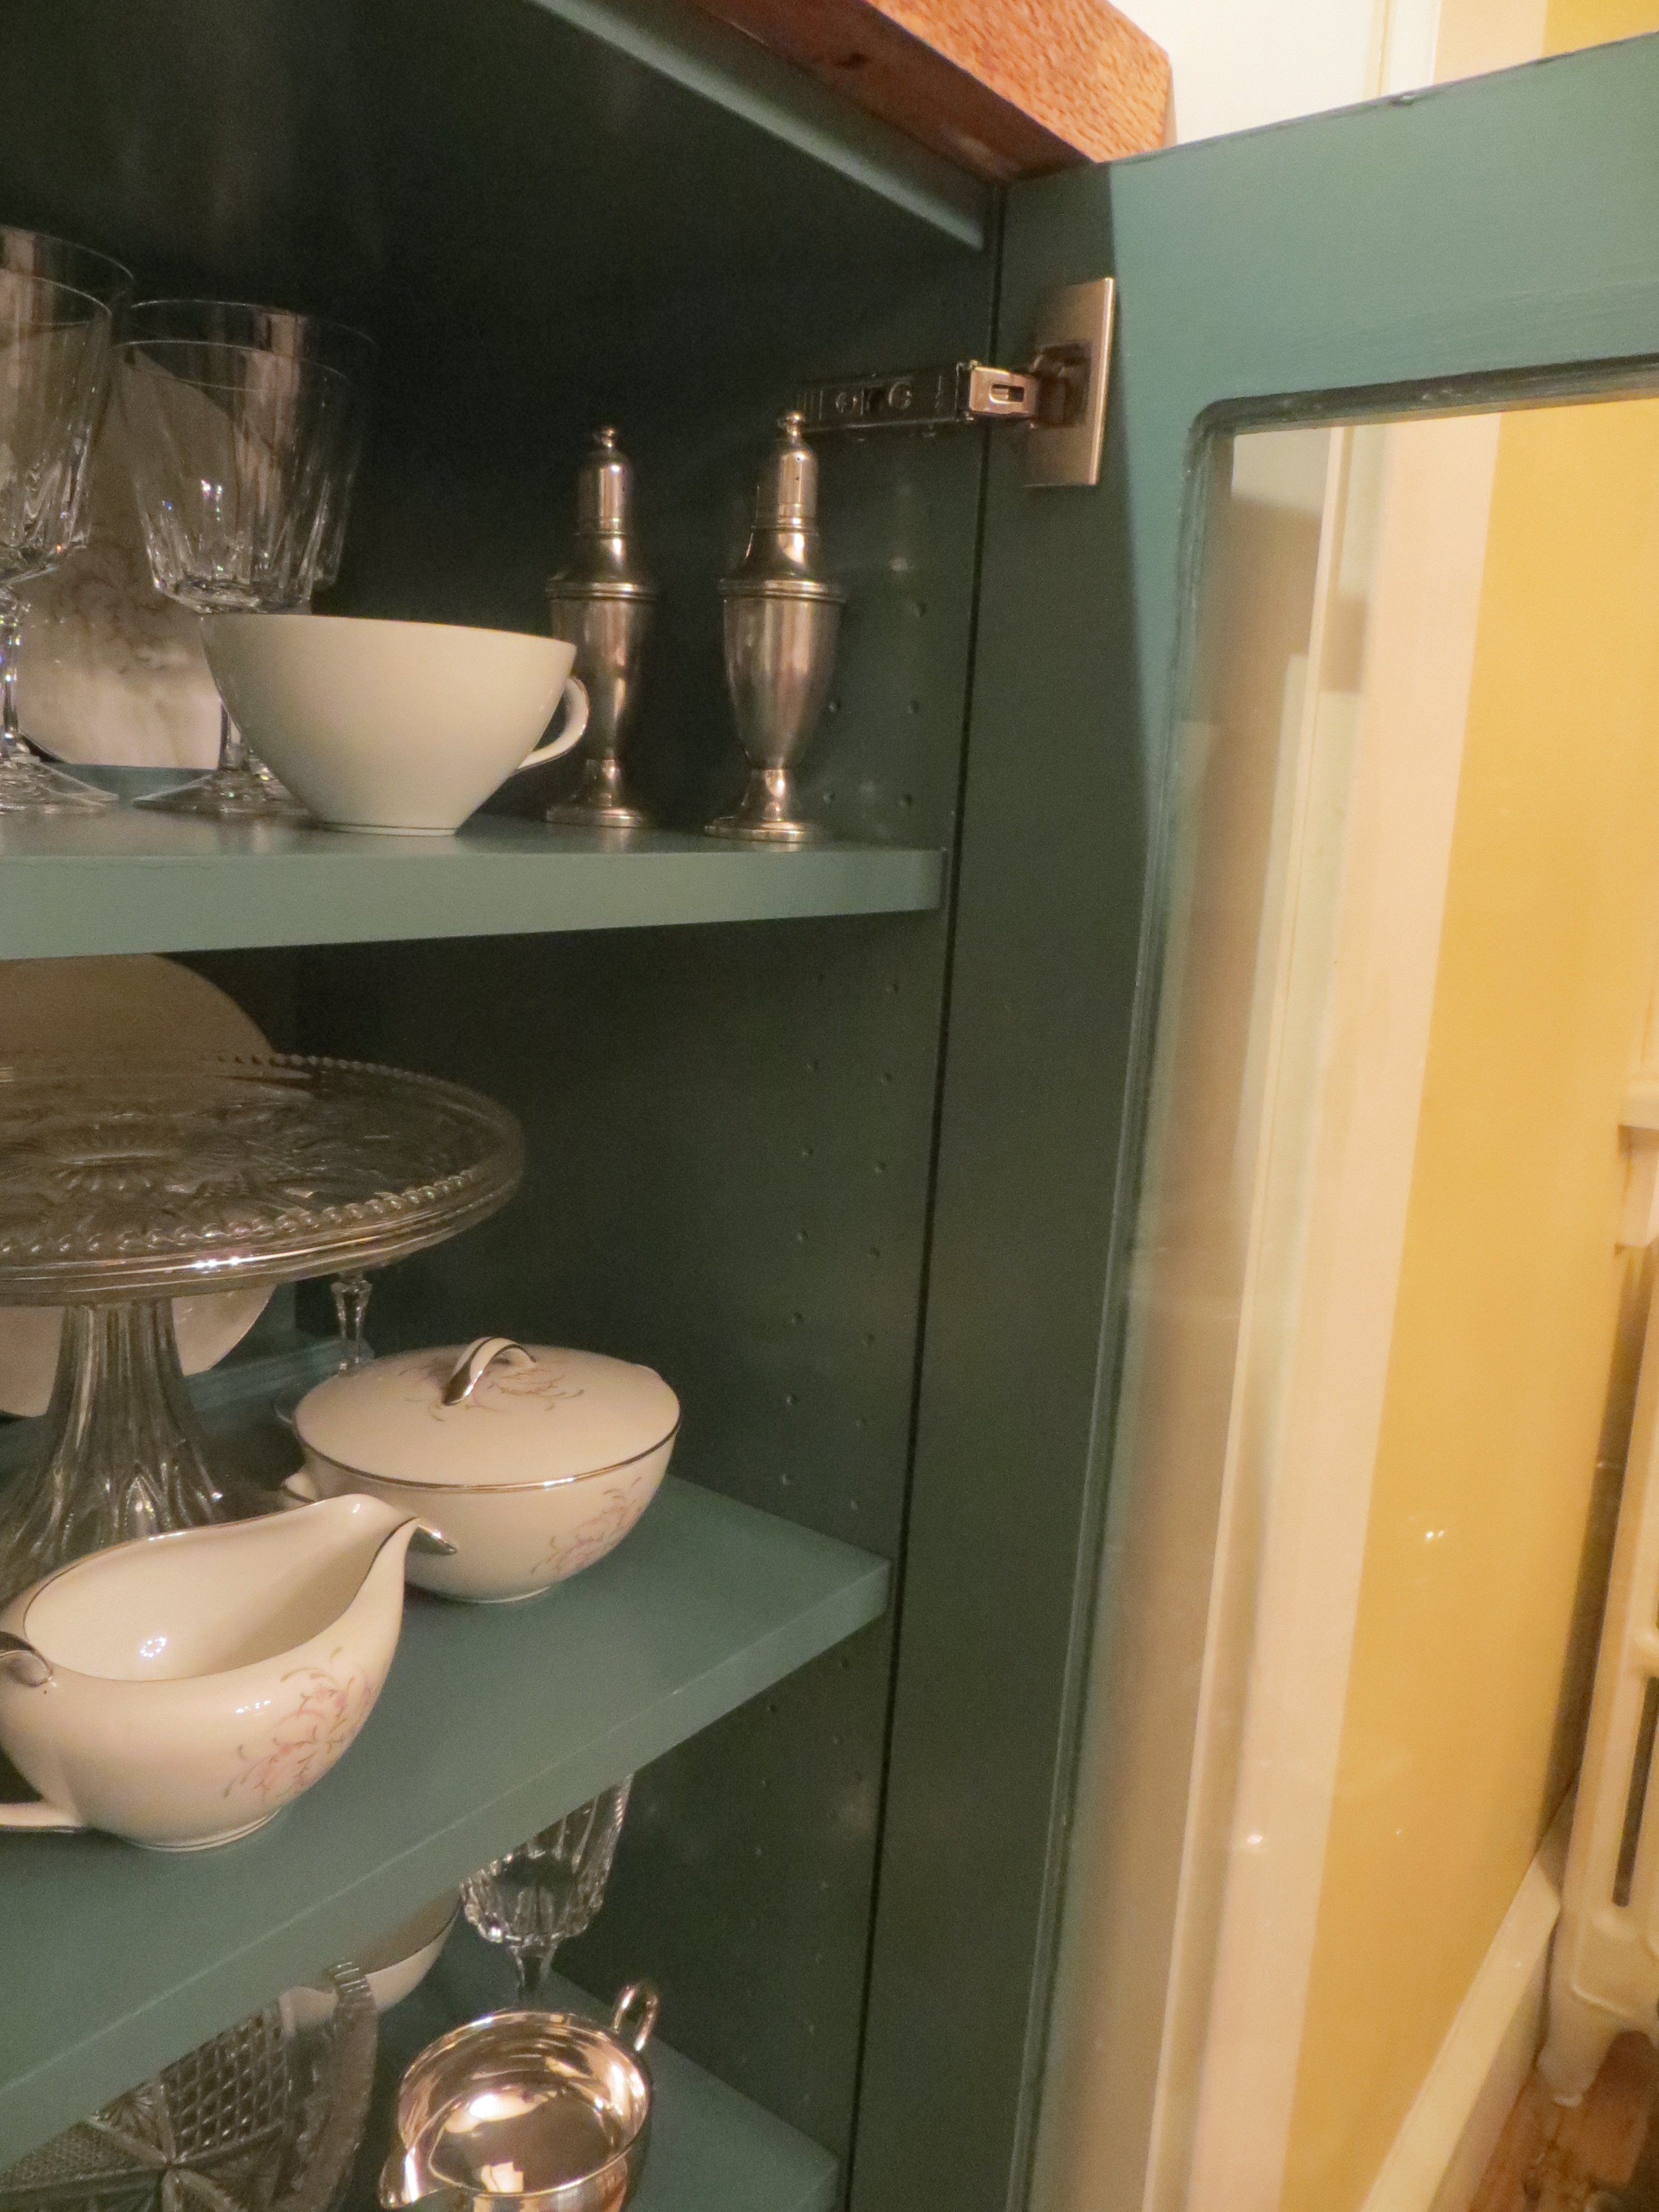
With help from my dad, I’ve gotten a LOT done. Between how slowly I work and how many flaws I find in these cabinet doors, I never thought I’d see the day. Now, I did have to stop painting a bunch of times because I kept spotting more flaws to grind out with the sander. But somehow, we reached the end of it! This means I did touch-up painting on all 7 of the base cabinet doors and then (my dad) rolled a final coat onto them. The upper cabinet doors were in worse shape so they got 2 coats. And now?

They look clean and in good condition! What a relief! And what a long time coming. And the dish cabinet is painted blue and has its plate rails and doors!

The project was annoying to the end. I repeatedly had to stop painting because I discovered that doors were cut too big and rubbed against each other, so I had to grind them down with the sander immediately before painting them. The most annoying of these was the trim at the top of the big interior arch. I knew it wouldn’t clear the cabinet door and asked the Irishman to run it through the table saw before he reinstalled it. He proudly told me that it was just fine. Now the corner is ground back a little. I guess it’s all the same in the end?
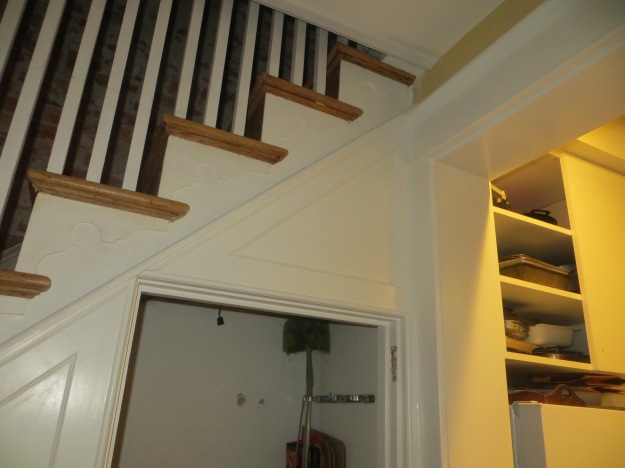
Speaking of which, I got 1 coat of paint onto that arch. That may not count as done but it looks a whole lot better. I also got one coat onto the little scrolly brackets under the stairs and the paneling. Except the panel with the light switch and everything to the right of it including the basement stairway door got 2 coats, including the basement stairway door. Meaning the things that matter.

Why do they matter? Because this wall has a switch plate, an outlet plate, and a thermostat mounted to it.

And there’s Art Deco hardware on the basement stairway door. Old door hardware is the most important thing in the world. Literally.
Then I was cooking and got sick of how hard it was to open the cabinet doors, so I put all the knobs on instead of cleaning up after myself.
Speaking of touchups, they might be the only kind of painting I can stomach for a while. I had wanted to stain the patio door and paint its jamb and trim this fall, but I’ve now wrapped up a tedious project that took over the whole house for the third time this year and I’m sick of it. But I guess you’ve heard that line before. The patio door and window sashes might actually be hard to do though because I’ll need warm weather to take them down and paint them.
And… the last step is done now! I got the 2 glass doors back from Malvern Glass, and they really went over and beyond. The woman I spoke to quoted me $13 a pane to cut the glass in rectangles, plus $10 per corner (a total of $80!!!) to clip the corners off because the irishman left the notches for the glass rounded with a router. But she said that slightly undersized square panes would fit and save me money. Then installation would be another $35 a pane, which I was unwilling to pay. Well, I got the glass back and the glass cutter rounded off all the corners to make it fit and taped it in place because on these crudely made doors every corner is a little different. I caulked the glass in place with clear silicone and used every bit of willpower I had to resist the urge to put them up last night. Then tonight I went at it rinsing dust off of crystal again instead of more practical jobs.
Last week the idea of being on a house tour was scary. Now, I’m thrilled with how much more finished things are. All that’s left is enough dust to write your name in my furniture, a bag of (non-perishable) groceries I bought a week ago, and a large wad of un-folded laundry on the couch. And there are still tickets available for this beer tour, so if you’re anywhere near here you should come! For $45 you get basically all the beer you could want, a lot of good food, a souvenir mug, and a chance to win prizes at my house and 4 others nearby. It’s a nice mix of food, drink, nice people, and voyeurism.
I’ve been complaining about this job since April, but sooner or later I need to put it to bed. And this year I’m a Beer Tour host again. This year it’s November 4. Time to start tidying up? Nah, let’s start a project.
(Look how cute the door prize baskets are though! If you want to come, event description and tickets available here.)

So what’s going on here? Well, I expanded the scope of the kitchen from just the doors to all of it, which now includes painting the inside of that cabinet that faces the living room. But first I took the extra trim left over from the top of the paneled wall, the little feather-edged piece that’s mitered back on either side of the door frame…

Off on a tangent, let’s remember that the door casing used to jut into stairway space and I designed the paneling like this very specifically to bring back that unbroken diagonal line. And when you have a very specific idea that you’re hiring someone else to do, draw it! When you tell your ideas to contractors, they hear THEIR ideas, but a drawing gets you what you want.

And some extra stop molding ripped down to look like that. I nailed this onto the cabinet shelves to make plate rails.
Then I painted it with Insl-X Stix Bonding Primer that my dad had left over from another job. And when I Googled that to verify the spelling I saw how expensive it is. Thanks, Dad! This stuff isn’t that much fun to work with. It has the consistency of pudding. But it allows me to paint over the cheap melamine veneered particle board cabinets that I got at a certain Swedish flat-pack furniture store.

Then there’s the non-linear progress. Remember how in early September I got the back sides of all the base cabinet doors painted? I re-hung these glass doors and to my horror, one of them didn’t close right. But my dad has a tool that is my new best friend: a belt sander that mounts to a fence.
I marked out how much to take off with painters tape to make the 2 doors line up with each other, took it outside, and ground it down. Now at least these 2 doors could fool you into thinking they were made well. I just need to paint the top again.
Then there was the small matter of the side panels. They jut out beyond the cabinet frames to make the doors look inset. One of them though had swirly saw marks in it. I tried the best I could to grind them down with a pad sander but it seemed like they just wouldn’t go away. So I troweled a thin layer of spackle onto the edge and problem solved! Solved so well in fact that it made the others look bad. So, the ones that are already painted are now getting the treatment.

Anyways, we’ve got a process here. A process that seems to be moving forward. After months of being demoralized by a seemingly endless parade of defects, I just might have found them all. Well, not all. If I want to get ALL I’ll have to remake a door or 2. But at least now they will exist and they will be installed and the paint will be in good condition.
Then I brought up the paneling. I’m painting that, too, and the basement stairway door. There’s a thermostat that goes on the paneling. I don’t need to turn the heat on yet but when I do, I want to install it onto PAINTED paneling so I never have to take it down again. Plus, the paneling runs straight into the big interior arch, which runs straight into the cabinets on one side. Best to just paint all of it. I’ll sigh when I think about it, but when I finish an area, I say, “Oo, shiny!”
I think it’ll be done and clean in time. Do you?
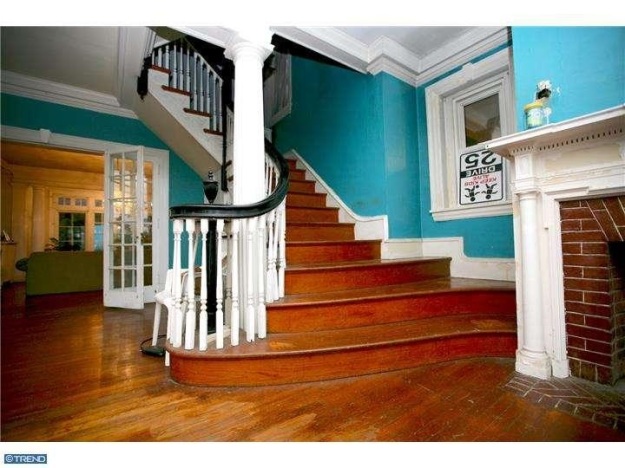
This weekend I was in the Wissahickon Valley Park (highly recommended) for a short hike. On the way back there was no choice but have a look at the place that surprisingly many people actually believed that I bought 2 1/2 years ago.

This house is in Pelham, a section of Mount Airy that was one of the first planned suburban residential developments in the country. There is a mixture of detached homes and twins but all of them are set back from the street like in a modern-day suburb, but with cooler houses than most. If you’re a little older than me and used to watch Thirtysomething, that show was set in Mount Airy.
Below, note the inappropriate replacement windows on the first floor. If I lived here, these would bother me much more than the windows with glass missing.

It’s pretty fancy for a colonial! Oh, and there might have been a little water damage here and there. (Photos with watermarks came from the MLS)
But how about today?

The stucco and pressed metal cornices are good as new! Looks like the original windows have been replaced, which is kind of sad. But it also looks like the replacement windows have been replaced, which was the most important thing in the world. But… I think I spot single panes of glass in the fanlights where there used to be really pretty patterned muntins. It doesn’t look like they cut corners with this place so I’m gonna assume that they had storm windows made and are using them to seal the house while the original sashes are out for restoration. I hope I’m assuming right. Also, how do I get to see inside?
I really should have been starting the kitchen, but that got held up this weekend so instead I decided to go to Philadelphia Salvage. Just to look for a skeleton key for the vestibule door and set screws for some old porcelain door knobs. Really, that’s all I was looking for.
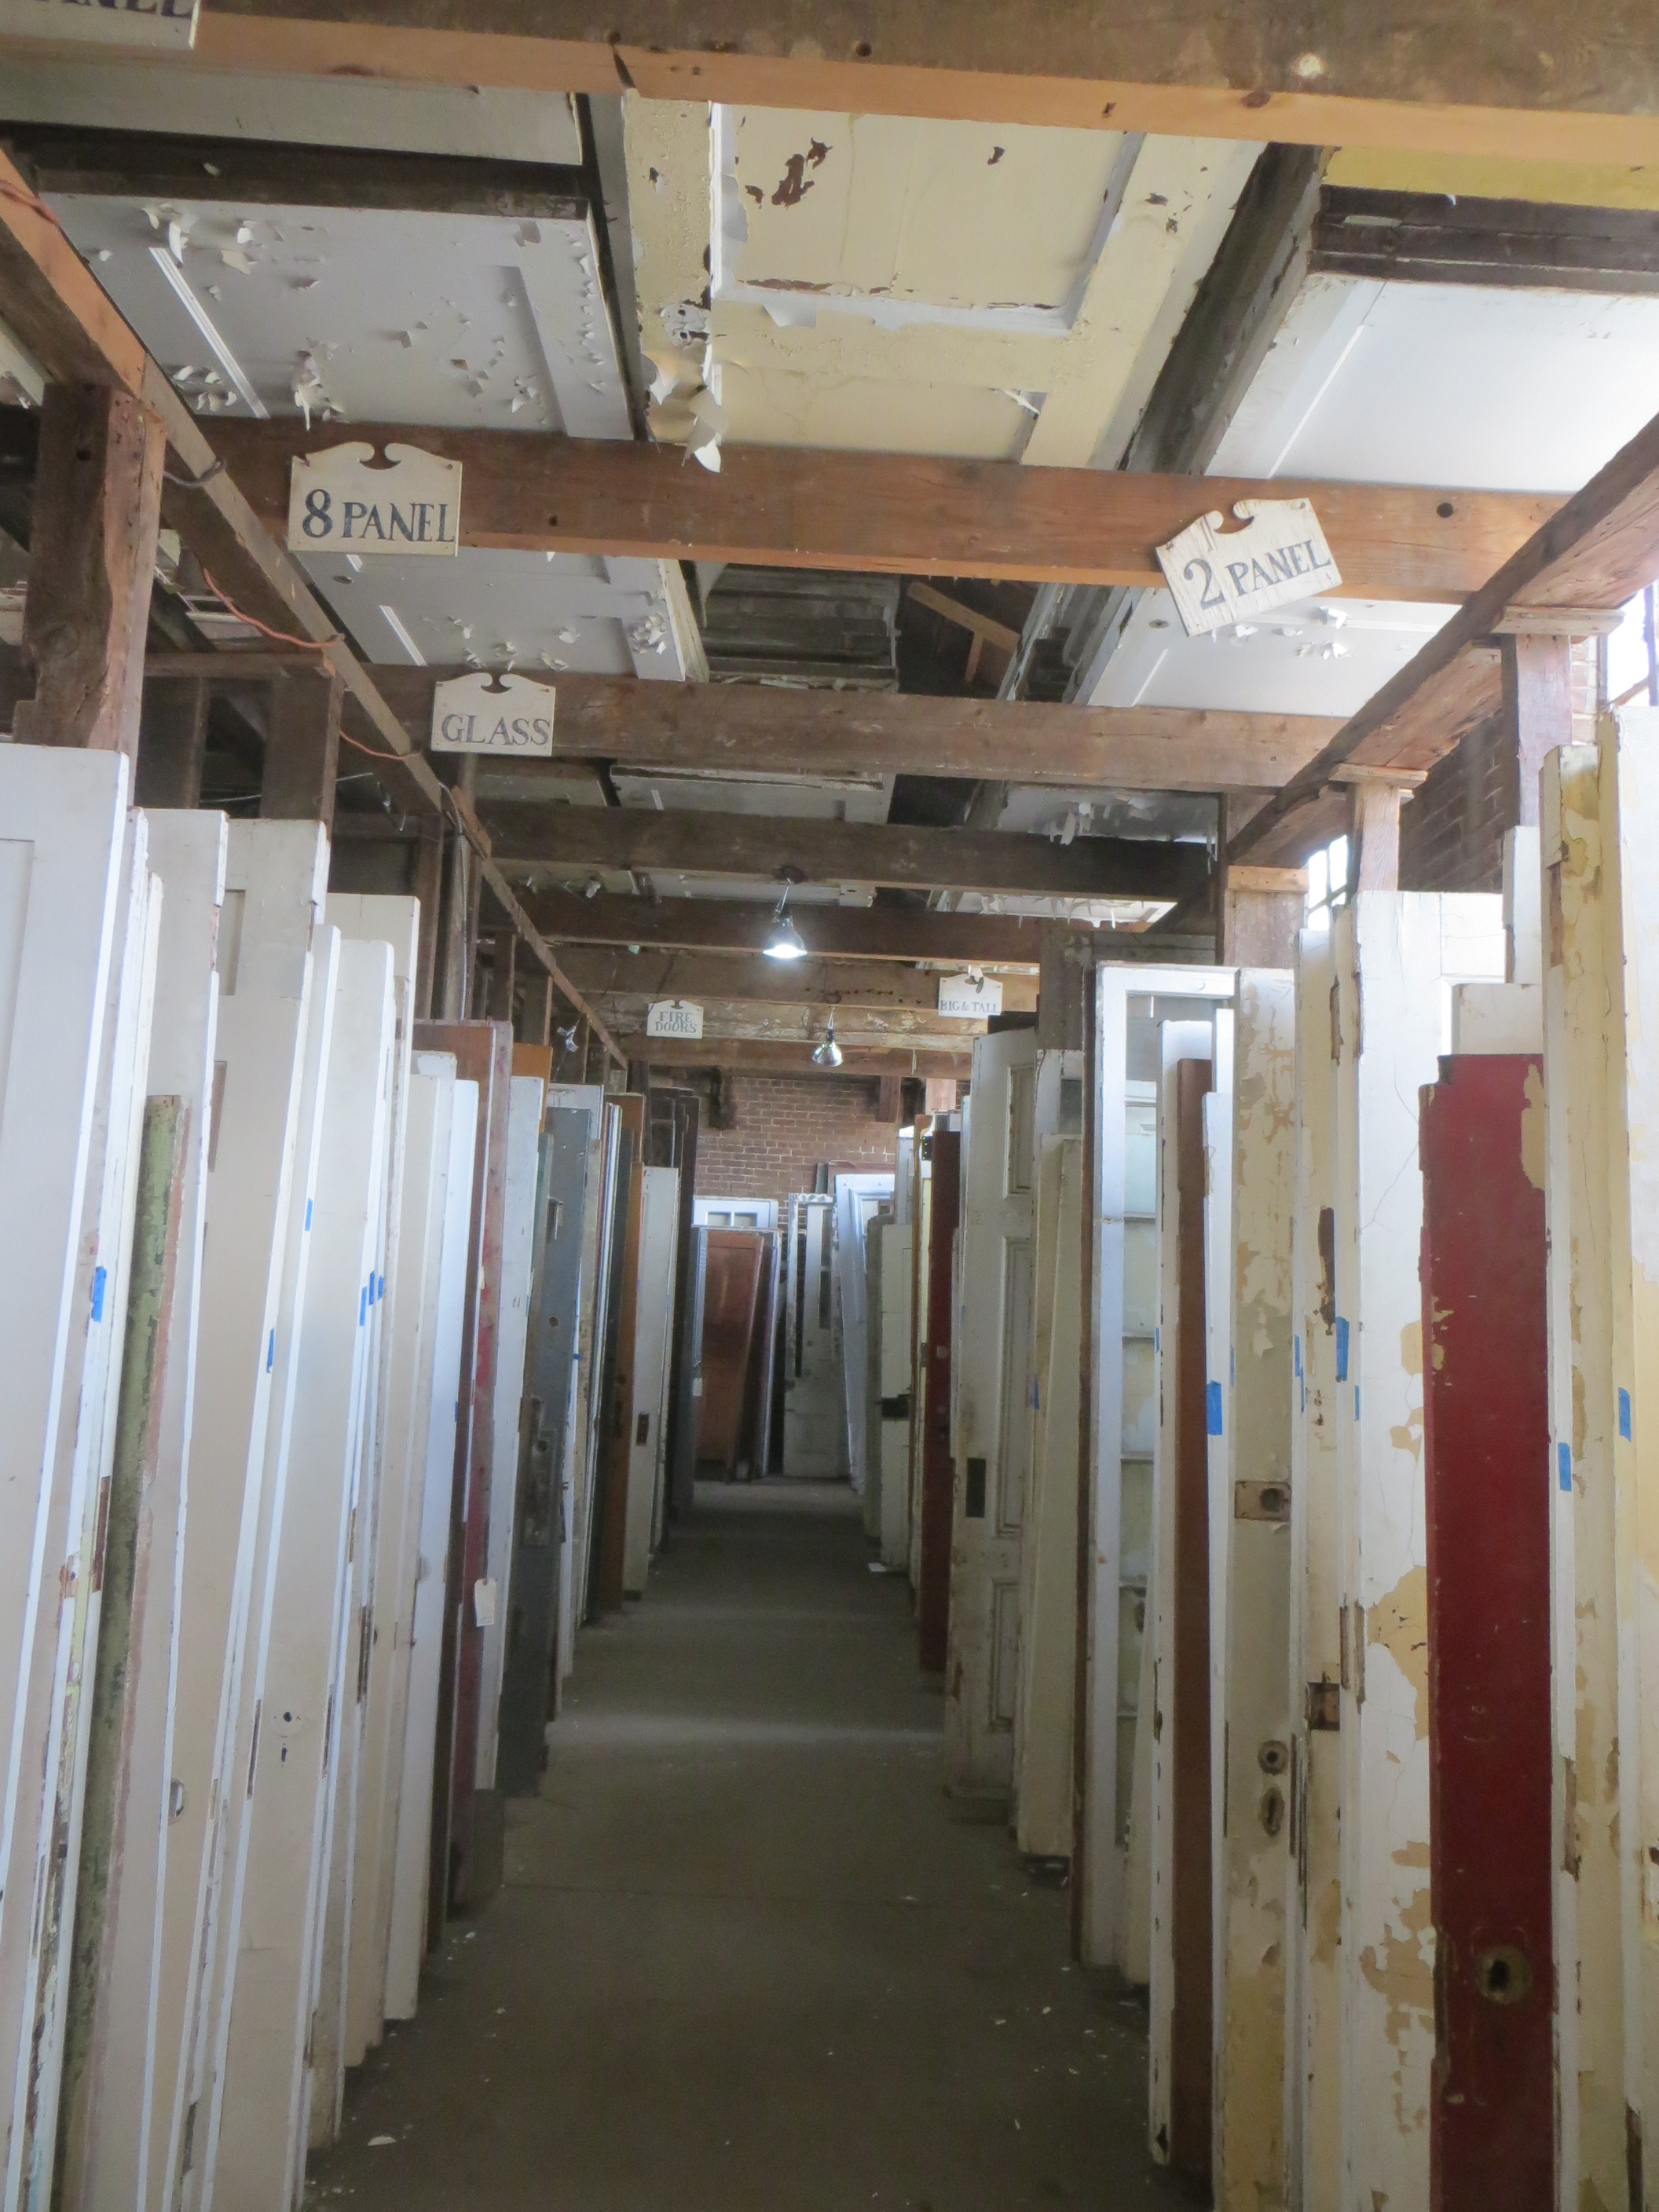
But, no luck. The few keys they had didn’t fit my lock and I couldn’t find set screws in the right size. My dad has a tap and die set though so I’ll get set screws and make them fit. Oh, did I mention I browsed the door aisle? But there were no exterior doors narrower than 30 inches. The guy there said that the kinda Art Deco doors seen on narrow houses in South Philly are called Hollywood doors and that they get them occasionally.

“What does occasionally mean?” I asked. “Because I’m trying to decide if I want to spruce up a door I don’t like that much.”
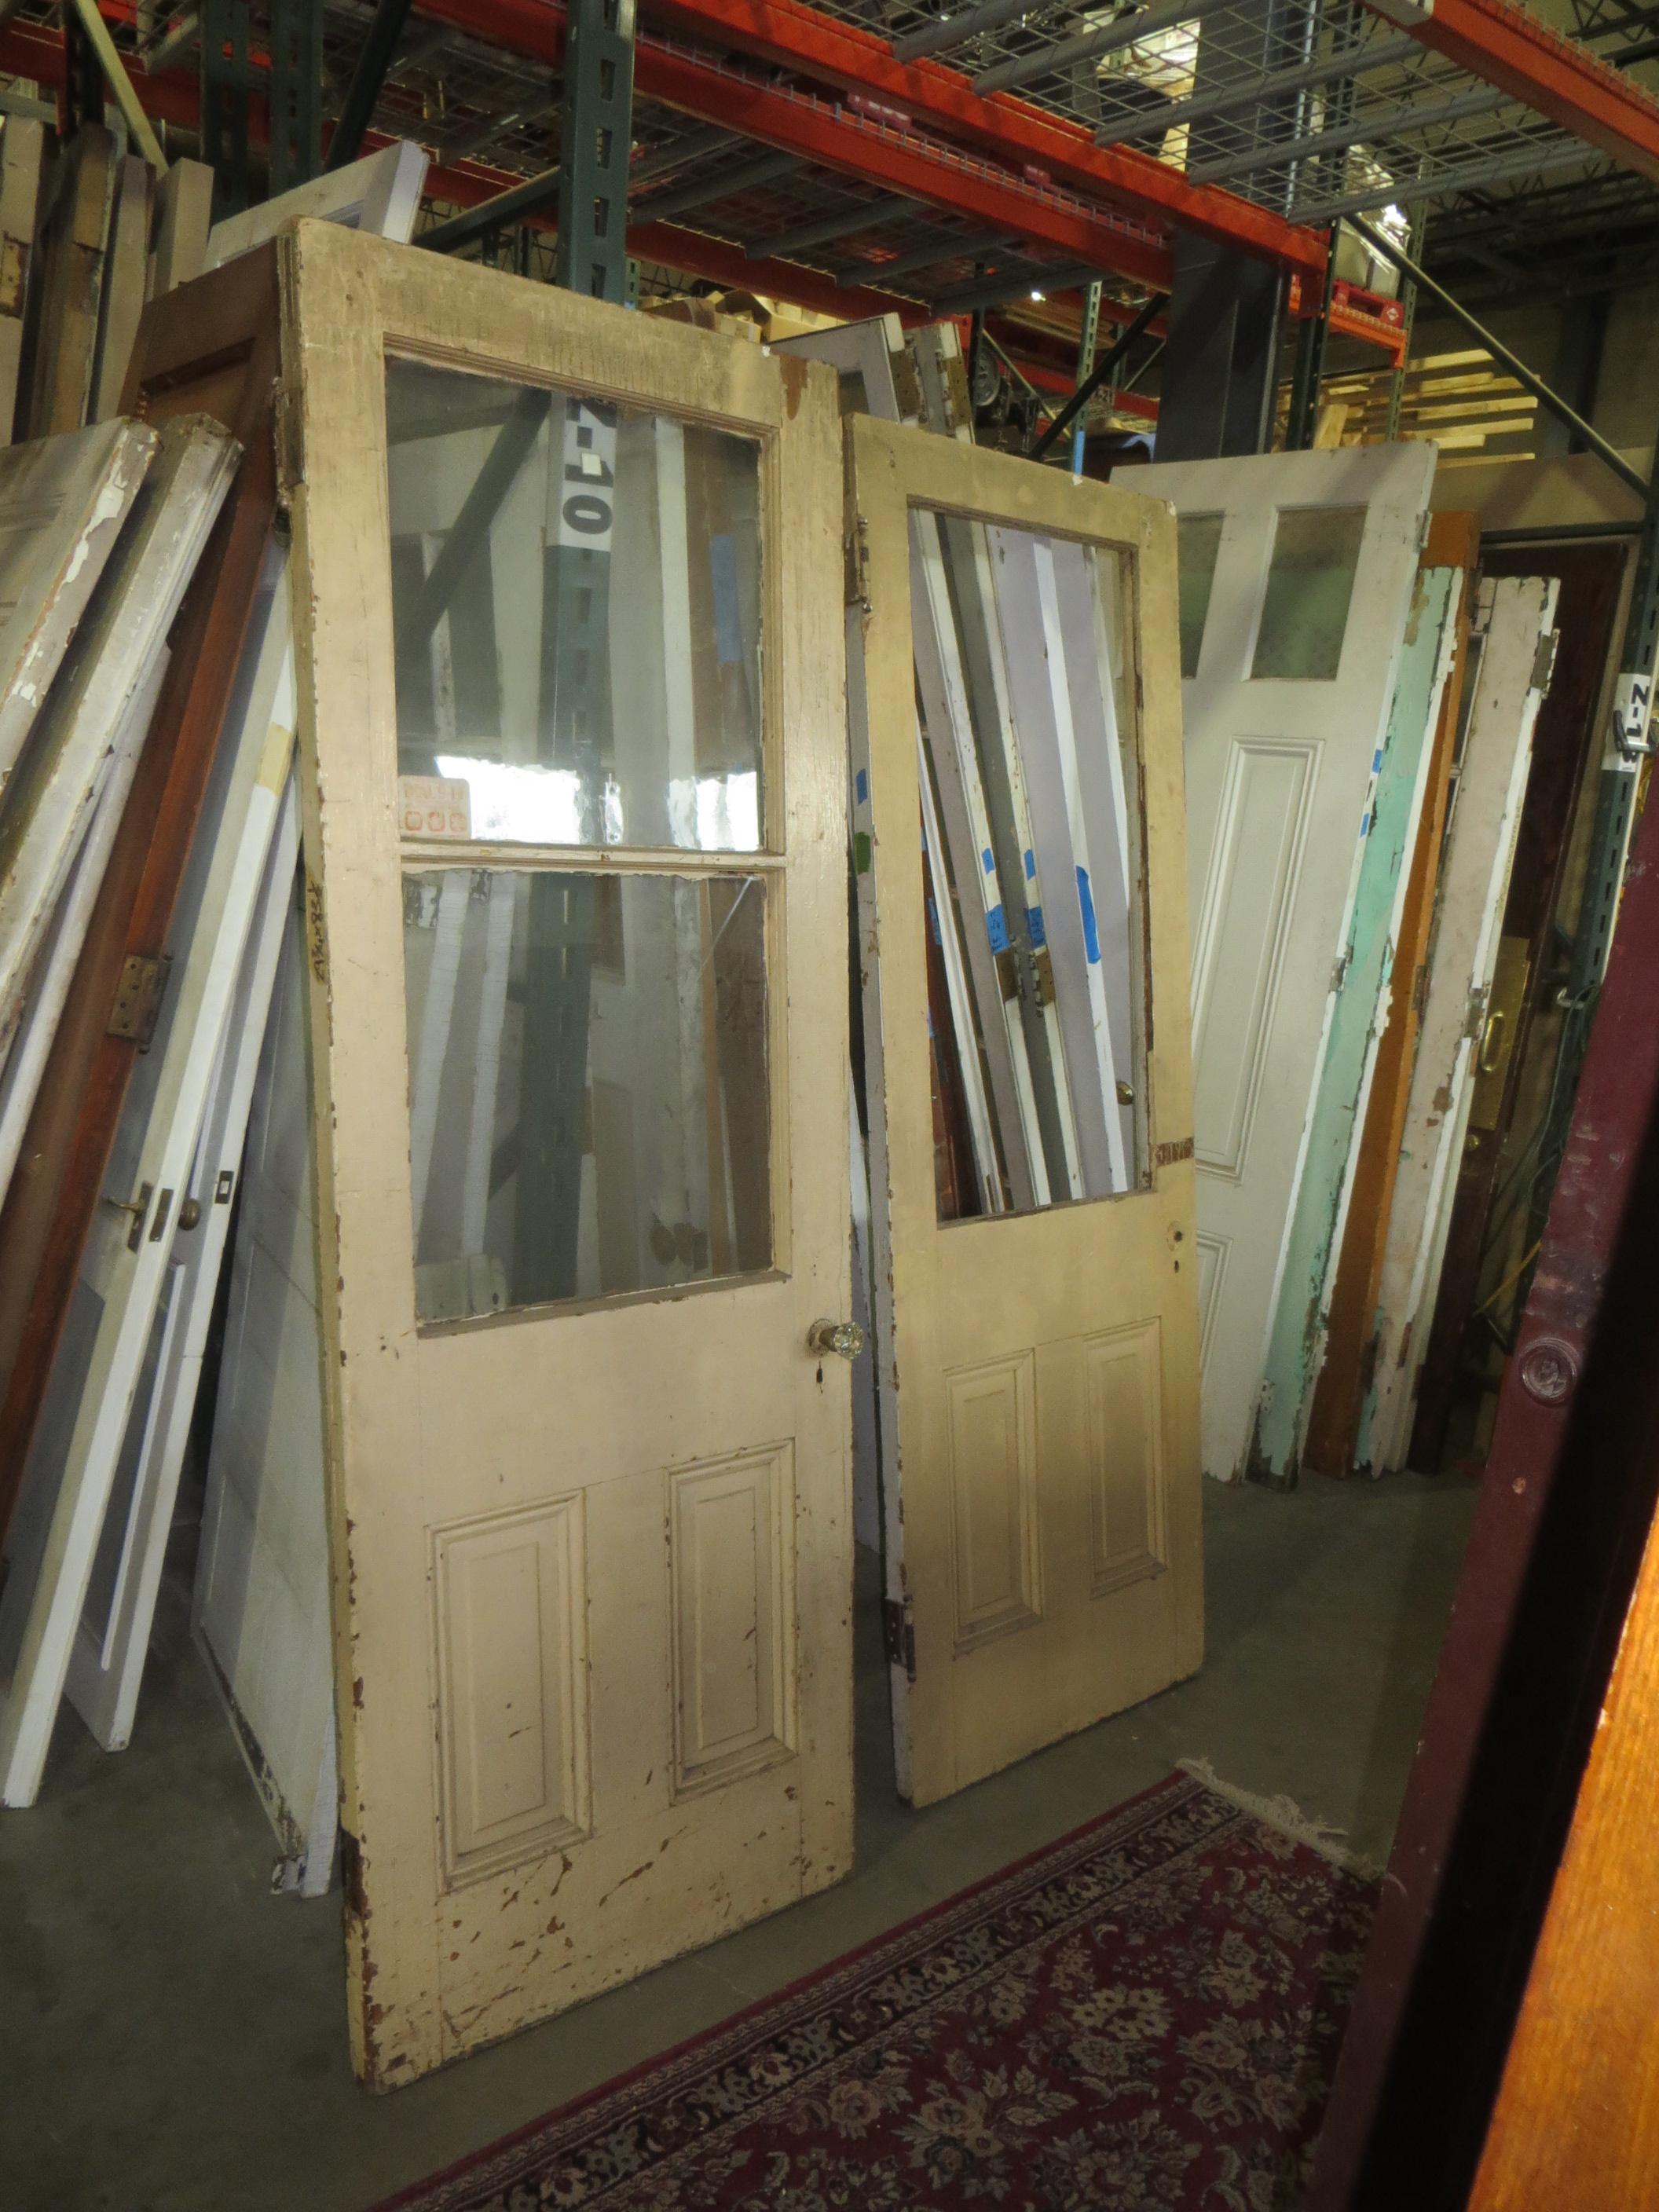
He said it’s a craps shoot. Anyways, back home I went. But after 4 years abstaining from the door aisle… I needed more. And, there’s… another salvage yard. Better yet, this one has more exterior doors! This blue door was just about the right size. I was ready to jump on it, until I noticed that it’s half rotten, that the fancy ledge below the glass is just a piece of contemporary chair rail, and that most of the panel sticking is missing with caulk in its place. I may as well just buy a new door at that point. Neeeext.

Then this one. It’s 28 1/4″ wide. I was hyperventilating now. All I’d have to do is make it a quarter inch wider and it would fit in the jamb I already have!

Then I saw the next one, which is identical. And it’s tagged “$800/pair.” My heart sank. I had already planned out spending the rest of my life with this door. So I asked, “Don’t guess you’d let me have just the one for $400?”
No dice. But really, I shouldn’t be spending $400 on a door, so all the better. This set would never, ever work, but I want it anyway.

Then I saw this one. It’s fitted with a mirror but it looks way to thick to be a closet door. And on the back side, the mirror is held in with nice glass bead. I said, “This looks like a front door! And it’s only 30 inches wide!”

Alas, 30″ is still not 28 1/2″ and the stiles aren’t nearly wide enough to cut that much off. And home I went, thinking about that plan to spruce up the front door that is all of a sudden way less exciting than it used to be. I meant to take a nap, but instead I spent an hour on my phone looking at photos from streets department work on PhillyHistory.org, a mapping website that allows users to search for, view by location, and purchase thousands of historic photographs dating back to the late nineteenth century.
I’m sorry for destroying your productivity for the day. (philageohistory.org does the same thing with maps. Sorry again and/or you’re welcome.)
I said before that truly original doors are extinct in South Philly. I wouldn’t even know what they look like. The “Hollywood doors” are the oldest I’ve ever seen there. But in among photos of curbs, sewers, and excavation for the Broad Street Subway…

Colorado Street, above, is very much like mine. And that house with the picture window appears to have… an original door! But now look below, in the 800 Block of Moore Street. This is a slightly fancier house type than mine but I guess not that far off. Note that the oldest doors all seem to have more glass than pretty much anything today.


The 2300 Block of Federal Street, farther west, still retained 4 original doors in a row in 1956!

And all I could think about was a door that I had passed over. It was old, but with 2 panels at the bottom and 2 panes of glass at the top, it was looking less like a back door and more like something precious and rare. It was all I could think about. And the next day I was back at Provenance again.
But what’s this to the right of the door I was talking about? A basically identical door, in slightly better shape, without the horizontal muntin that I don’t like. At 29 3/4″ wide and 83″ tall, this door needs to be cut about an inch narrower and 3 inches shorter. That has me a little skittish. But the guy liked me. He told me he could let me have it for $80 because it’s missing its glass, and so my new car lost its door-ginity.

So, I hope this door works out. It would mean that my monomania got us somewhere yesterday.


