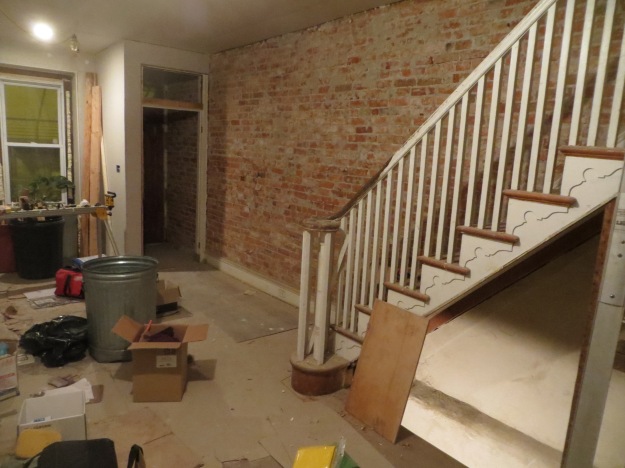
Did you think I forgot about this? You might have since I haven’t mentioned it since January. It’s looked like this for about as long as I can remember. Leave your kids at home.
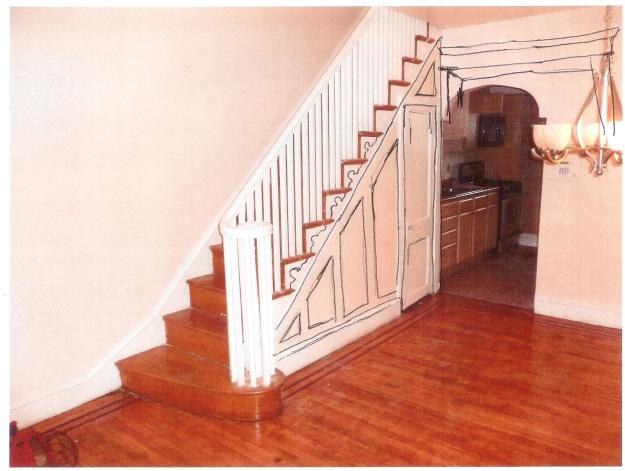
But the panel on my stairway wall is very much still happening. Here’s the sketch I made way back when.
The whole point of doing this was to make the wall come out for access to the basement. I can’t remove it all though because there are switches and wires in that wall. The Craftsman-style long skinny panels are perfect though because the panel closest to the door can be fixed while the next 3 come off. On top of that, there was one aesthetic problem I wanted to solve. Not a huge one, but while I’m at it…
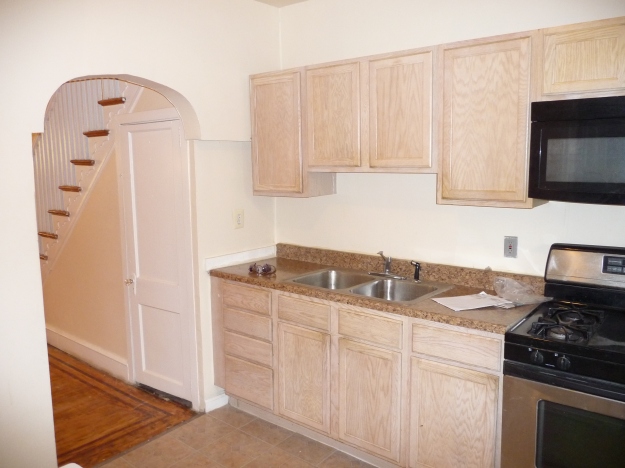
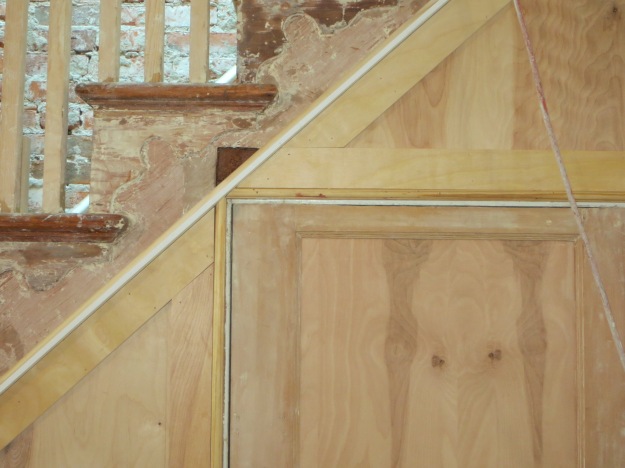
You see, the door to the basement used to be in the kitchen and someone filled it in (weirdly), moved the stairs toward the front of the house, cut the door down, and put it on the side of the stairwell. This was a big improvement in the kitchen, but I wasn’t fond of the weird wall where the door used to be or the way the casing around the new door jutted into the stairway woodwork. Plus, there was a triangular chunk of the wood hacked out and filled in with drywall and caulk. I think this happened in the 50’s. (And remember, the house didn’t look that bad when I bought it.)
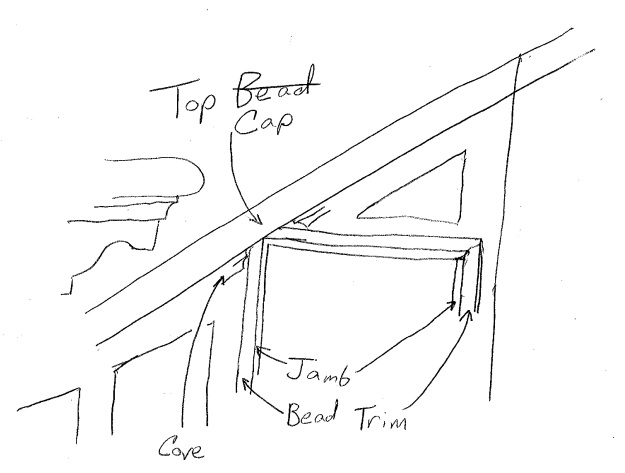
I decided to use a wainscot cap to finish the paneling, which is now thicker than the edge of the stairs. And there is no casing at all around the door, just a little strip of sash bead. And the cap comes so close to the door that the bead doesn’t even go all the way around. The Irishman thought I was crazy for wanting to do it this way, but he said he’d build it. He sent me a photo of the opening with sash bead all the way around the door, which was wrong! So I quickly sketched it (not to scale) and texted him a photo. (Though this is a scan. It looks better.)
And then he built it and it’s perfect. Except that little hacked out triangle. He’s going to stick a piece of plywood in there and then fill the cracks with Bondo. As in auto body filler.
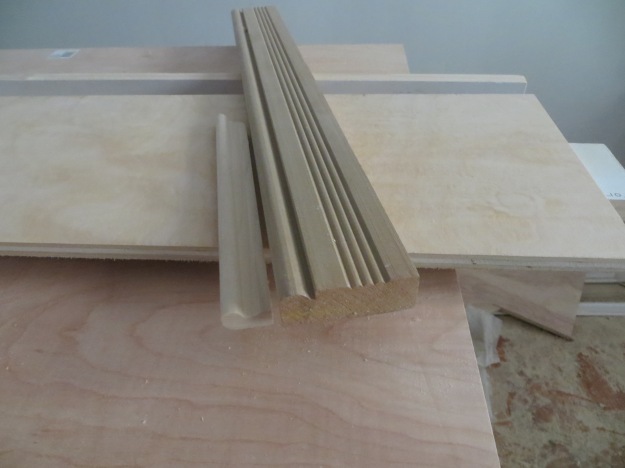
And remember how I was going trim inside the panels that looked like the sticking on the door? That didn’t quite work out. He hates wasting molding passionately, so he made custom panel sticking out of the scraps of my upstairs casing. It’s that small piece to the left. He says we’ll find a place to use the reeded part to the right, too.
So that’s where we are now. It was hard. And because I’m paying him by the hour, it was expensive. But I love it, and if I get my finances in order by 30 it’s all good, right? Stay tuned, finishing touches are coming together so there might be a big reveal in the near future!

Oh Happy Day! Will you be relieved and proud or itching to take on a new challenge?
LikeLike
My pocketbook and I are ready for a break.
LikeLike
Good solution to the ugly problem. You know, the other thing you could have done is to take a triangular piece off the corner of the door. I think that would be nightmarish for some carpenters, but by the looks of it, I think the Irishman could have handled it.
Are the cabinets all in the kitchen, or is that how they used to look when you saw the house?
LikeLike
I thought of doing that but I’m astonished at how much was already cut off the top and bottom stiles of that door and didn’t want to weaken it more. Of course I could have had a diagonally oriented stile built. But that would have cost more. The door and jamb were in usable condition and I drew the line and kept them.
LikeLike
Sensible choice!
LikeLike
And as for the cabinets, some of them are still in my basement. My plans morphed from keeping the kitchen as found to rearranging its parts the best I could to replacing them. They’re pretty junky and the wall cabinets were glued up and in the end they didn’t seem worth keeping. I would have been kinder to the previous kitchen if it were still intact, but even that would probably not have been laid out well.
LikeLike
Yes, what’s with gluing cabinets to the wall and countertops to the cabinets? That’s not how I was taught at all.
LikeLike
There were no studs in the walls
LikeLike
Good gods! No studa? I think the walls need to be rebuilt to have studs. This is so sick!
LikeLike
They’re brick
LikeLike
Oh, I’ve got it now. It’s the same brick wall that is exposed in the front room and staircase. Usually with that construction, though, there are internal studs to which the walls fasten (like framing for plaster lath or sheetrock. I’m trying to understand how the floor on the second story fastens to the sides of the house if there is no internal structural frame. For the cabinets, then, I guess you need to install a ledger board and hang your cabinets on that.
The homes where I visited and stayed overnight in Iceland are constructed of cement, fortified with Rebar. The floors are cement also, but they are overlaid with wood or tile in many cases. The roofs are metal. They’re very sturdy to withstand the winds off the ocean. But they have interior home construction methods up there to suit that type of structure. The ledger boards for kitchen cabinets, for example, are fastened to the wall with bolts suitable for cement. I’m sorry I didn’t get to see them working on their houses, but they showed me their recent improvements. I asked and they told me how they did it. (One of the members of the family is in home construction.)
LikeLike
My floor joists all run into pockets in the brick. And the traditional masonry construction of this house isn’t strong enough for concrete anchors to work. I tried. That’s why when I put up rigid foam I drove boards into the floors and window fames and leaned weights against it till the glue cured.
LikeLike
Wow, the crooked house is not only crooked but also too wobbly for concrete anchors? Now I admire your solutions all the more.
LikeLike
It gets better. One neighbor suggested that I drill the brick and insert dowels to hang pictures! He said the bricks will never hold a nail
LikeLike
Oh, my. Well, there is also the Command brand hangers that glue to the wall. I have hung all kinds of things with those, some rather heavy things, too. They come with different weight limits. However, I don’t know whether or not the brick is smooth enough to accept the glue strip.
LikeLike
Not too wobbly, too soft.
LikeLike
I’m so impressed by the tough decisions that you’ve made and of course by the ingenious solutions that have been found!
LikeLike
We already framed out the walls with 2×3’s and covered that with OSB to make it easy to hang cabinets. Those 2 walls in the kitchen are among the few that are level or close to it.
LikeLike
Got it. It’s going to be great and sturdy also.
LikeLike