I’m getting fed up with how little is getting done. Somehow, this frustration is leading me to do less. At this point, I’m trying to decide exactly how I should detail the insulation on the front bedroom wall. If you want to help give me ponder over bringing together modern insulation and old fashioned masonry, please read the next paragraph. If not, you may be bored and prefer to skip to the following one.
My exterior walls are solid, load bearing, lime based masonry. This means there is no wood or air in them. The plaster is right on brick. The floor joists are embedded right in brick. There’s not a stick of wood in any wall that’s holding anything up except plaster (or sheetrock – most of my plaster was sadly unsalvageable). And there is no cement in my bricks or their mortar. My house is built just like any house 500 years older, and nothing like anything 10 years newer. This front bedroom wall is one of the few in the house that I could have kept. But there’s no insulation. Even an air cavity would be a lot compared to plaster straight on brick. Most people would attach furring strips to the plaster, then foam on that, then plaster on that. But I read that it’s better for the brick to try to glue the foam to the plaster everywhere. Less moisture intrusion and what not. So do I put furring strips over the foam board, and then drywall over that? I’m thinking of putting wood around the edges of the room and the windows, and then 48 inches apart, and installing foam inside of that. The foam should be enough to keep the 5/8″ drywall from bowing or feeling too flimsy, and wood blocking on the seams should prevent it from cracking. Adding more wood than that would be extra work to make the insulation worse. Furring strips over the foam board would still leave the corners of the room vulnurable to cracking, make the room that much smaller, and not really add much to the insulation in the room. This is all what I think is true. I may well be wrong.
So anyways, today I went to the home depot. I spent over 100 bucks, like I do almost every time I go there. And then at my house I got next to nothing done. I stared at things, tried to figure out what exactly I’m ready to move forward with, and then put my head in the clouds. I’m happier there.
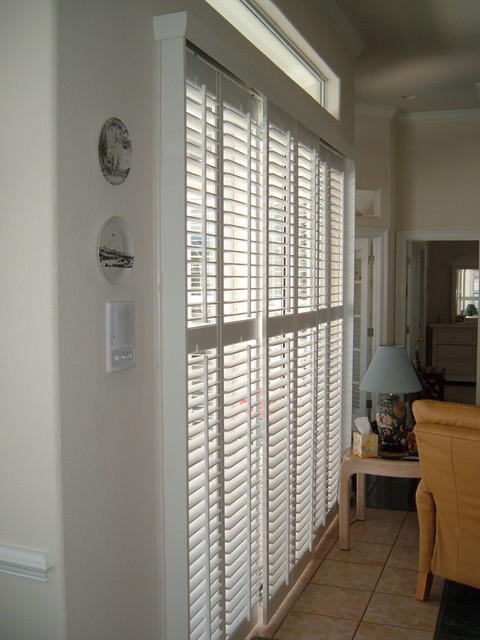
One of the totally useless things I’m thinking of is window treatments on my giant patio door. Having anything hanging to the sides would interfere with kitchen cabinets, but in the city I ought to have something I can close at night. On the other hand, vertical blinds make a security risk look pretty attractive to me. Then I thought of something truly brilliant. The patio door is exactly half the width of the (original) room, so I can have giant interior shutters made and frame the wall out so they open and close like pocket doors, inside the wall! They will open for maximum light and disappear, getting in the way of nothing! Better yet, the Internet tells me it won’t be that terribly expensive. If I can pull this off, it might just be the smartest thing I’ve ever thought of in my entire life. They will look kinda like this (in my imagination) except better because they won’t be bypassing and they’ll be recessed into the door opening behind the woodwork.
The problem with this? The kitchen WAS 10 feet wide. Then we framed out the walls with 2×3’s to make them level for cabinets. And then I had the stud cavities on the one side filled with spray foam. This means I’ll need to cut out the spray foam, cut down the sill plates, and move the end studs over to make the cavities big enough. I’m totally doing it. Here’s what’s in the way: 
Where the door is now becomes wall. Where the stud embedded into the spray foam is becomes pocket door cavity. And most of the existing 10 inch thick load bearing brick wall that door is installed into becomes door opening. This might take me to the cleaners, but it’s the only way I can have a decent amount of kitchen cabinets. I’m doing it, even if there’s no money left to buy those cabinets.
Then there are my upstairs doors. I’ve decided I’m officially leaving them stained, even though they’re beat up. The wood is pretty enough that whatever happened to them in the past is now character, not damage. I’ll fill nail holes and leave it at that.
And, I got all my true loves together in one photo. 
Ahh, my 3 different styles of door knobs, my not-quite matched keyhole escutcheons, and my brilliantly restored mortise locks. I love them all. Even though I can’t use any of them yet. And great story, I have a co-worker whose elderly uncle is a retired machinist and a flea market dealer. He has some giant hoard of keys, so he took my old locks, dismantled them, oiled the parts, reassembled them, and then went through his hoard and found keys that fit. He really did a fantastic job, and better yet, once I left a check in my desk drawer at the end of work, and came back the next morning and found locks! It’s just like a drug deal, except these are more addictive. I probably have one of the only pre-war houses ever where all the “original” hardware is working. (If we wanna be honest, the house only had one old door lock in it when I bought it, and I’ve already taken all the new ones the place came with outside for the scrap metal scavengers. But we’ll pretend they’re all original.)
And I have a small challenge with the closet doors in my front bedroom. Recall that I’ll be using bypassing sliding doors, an historically inappropriate choice, but a practical one, so I’m going to pretend they’re pocket doors from some parlor that’s far too grand for my house. Also, the closets I have would have been too grand for just about any house at the time anyway, so it’s all fine. I think they’ll look too good to look silly, and that’s what counts. But back to the doors, they had holes cut in them for their original mortise locks, which were filled, and then they were drilled out for modern tubular locks. This means I have a pretty massive scar to cover up, so I need pocket door hardware that is truly massive. I’ll probably end up with these:

Absurdly fancy and perfect. And really, they go with the doors. They look like this, remember. Except now they’ll be stained.

Awesome door. Yes it’s upside down. Trust me, the other one looks the same.
So there, a bit of planning ahead this week. As I move toward finish work these things should start coming together. Maybe next update I’ll have enough progress to give you an update. There was a little this week anyways.


Chad, I have no opinion at all about the insulation foam board. We’ve never insulated directly onto brick, only in wood-framed houses.
We do have some experience with pocket doors, including those in the old Victorian houses we grew up in and some in new construction, including our 2012 addition. Here’s the thing: you do need a specially kind of framing to make them work, which you are saying your old house doesn’t have. And it looks as though you have already got electric boxes in there. Electric boxes and plumbing don’t fit in walls that have pocket doors in them. Plus, you cannot attach anything like cabinets to the half-size studs you will need to have to allow for pockets. So I just don’t see how that will work.
Here’s two ideas: Can you allow room on each side of the door for folding shutters? Or failing that, do you have room above the doors to install Roman shades that pull up and out of the way when you are at home and it is daytime? Think about something like the bamboo ones that are on porches in summer homes–they roll up and out of the way.
Here’s a third, much simpler solution. Over my sliding patio door I have hung two unobtrusive off-white opaque panels with back tabs, one panel on each side. Two brackets (metal “hold-backs”) keep the panels out of the way when not in use and don’t interfere with the operation of the door. When I want privacy or protection from the sun, I can ease them out of the hold-backs and put them across. The hold-backs I chose and the curtain panels take up only 5″ of wall space on either side of the door frame. I got the panels at a Home Goods store, very cheap. Unfortunately, they need to be dry cleaned, and the cleaning cost me as much as the panels cost in the first place. So I will be replacing them with similar, but washable panels when they get dirty again. 🙂 Even if I have to make them myself.
LikeLike
Well, my kitchen is going to have kind of a galley setup with the patio doors on the end. I already had the wiring and plumbing installed in the side walls, so I don’t need any performance out of that pocket door’s split studs. Trouble is that with anything hanging down next to the door, it would interfere with doors and drawers opening. Inside mounting the window treatments means no obstructions. I made a 3D rendering in the IKEA kitchen design program but haven’t shown it yet because I haven’t really begun my kitchen in earnest yet.
LikeLike
And if the curtains are a total loss anyway, you may as well machine wash them and see what happens.
LikeLike
Yes, I might as well! But I will wash them by hand to increase the chances they will survive.
I am still having a hard time picturing the proposed layout of the cabinets in relation to the doors. Maybe you can post your plan. Is there at least a door frame between the end of the counter/cabinets and the slider? Is it possible to stop the cabinets two inches from the back–or more, and install an open shelving unit without doors and drawers, slightly recessed from the cabinets? But I seem to remember you’ve already bought the cabinets, so maybe adjusting the size is no longer possible.
If it’s the case you can’t adjust your original plan, I think a pair of roll-down shades or the recessed shutters you spoke of might work best. I assume you will install the split studs. Don’t forget some kind of stop at the back so that the doors don’t fly into the wall and disappear. Saw this in a friend’s new construction; they had to open up the sheetrock and get the door out. In another house, the builder installed the sliding door properly, but in the wrong wall. This happened before the plumber got there and installed the toilet where it was on the plans, right next to the opening. When he was finished installing the toilet, he had to climb over it to get out the door. That means the homeowners would have to climb over the toilet every time they went into the bathroom. He didn’t see fit to let the general contractor know, and the general contractor, while doing the final inspection, didn’t notice that this was a problem. I know you are getting sick of construction, but at least you have the final control of what is going on.
LikeLike
Posted. Thanks for all your thoughtful replies!
LikeLike
I’m glad those gorgeous doors will end of stained! For the mismatched hardware dilemma, I ended up using what matched on the outside of the doors facing the hallway, and the mismatched pieces inside the rooms, almost looks like I planned it that way…
LikeLike
Yep, same here. The first floor of my house was gut renovated in the 30’s, while the second floor had woodwork from circa 1905 and doors from the 60’s, so I decided to restore the two floors to the eras they came from. But then I bought very Georgian doors for the back bedroom closet, and they came with awesome brass knobs, and there happened to be another one at the salvage yard so I bought it to do different hardware in that one room. I didn’t even try to get closet doors that matched the house because big closets didn’t exist back then. So I have doors that are the right size and are hopefully awesome enough that it won’t matter that they don’t really suit the house.
LikeLike
My screwball way of looking at things? Pretend you’re the original owner around the time the house was built and you were told you could upgrade the house… Big beautiful doors, hell yeah (same goes for brass doorknobs)!
LikeLike
ha, except the fanciest ones (1930’s neo-Georgian) are in the small back bedroom. So whatever. If we have an imaginary history of my house, they decided to put super expensive but understated Georgian hardware in there at the same time as they put cheap, flashy brass plated steel Deco style hardware in the living room. Now what were your Victorian closets like? I’m kind of blown away by your house and the job you’re doing with it, by the way. I’d say I envy you, but my 800 square feet are enough trouble!
LikeLike
I may be missing something but why not frame up the walls against the brick and use something other than foam for the insulation in this case? Jo @ Let’s Face the Music
LikeLike
Hmm, this would be a long one. I’ll write about all my sources of insulation related anxiety once I finish this, which is…wait for it… (aside from the future patio door wall) much the last bit of insulation the house needs!
LikeLike
The door upside down is so “Alice in Wonderful Land” feeling. II know it isn’t practical, but it would be fun to do one upside down just to catch people off guard and make them smile.
LikeLike